hugh kingdon's adventure sports website
more f...wit tours epic adventures
Ten top tips for aspiring
grade III and IV paddlers.
From beginner to grade V in one year… read on !
Introduction
With the beginning of the new season just around the corner, I thought I would share a few tips. I hope that you can learn from some of my mistakes, avoid the beatings I have taken. In brief, here are a few focus points for whitewater success:
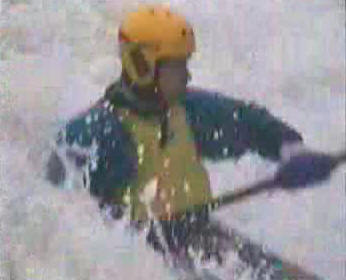
1. Control is more important than speed
3. Use a low-brace for stability
4. Tips for getting out of stoppers
5. Inspect ! Inspect ! Inspect !
8. Prepare and train for accidents
10. Be Prepared
Control is more important
than speed
In most situations, speed is your enemy. Too much speed and you don’t have enough time to think. The slower you can go, the more time you have to plan and anticipate events, and the more time you have to react if something goes wrong. On a typical river, most of the time I am back paddling, bracing, or drifting. Speed is usually easy to acquire, from the current, and with speed comes it’s dangerous cousin momentum. At times paddling a boat in a current can be like driving a car on an ice rink – once you get going in a certain direction it can be difficult to change direction, you can spin the car (or boat), but you continue onward. Each genuine change in direction and change in momentum requires you paddle hard simply to cancel the previous momentum, and to build new momentum. For this reason I try to keep my speed down as I go down the rapids.
So when do you need speed ? Here are a few common places a) to ferry glide across a river ( n.b. you are pointing upstream and actually have very low momentum). b) to punch a vicious stopper with no natural weak points c) down the motorway !
When you run a section, plan your route and before you allow your momentum to build, first consider how you are going to lose it again. Keep your speed down and your routes simple. Simple routes with fewer turns are easier to make and they conserve your energy..
Tips for slowing down
Slowing down whilst in the middle of the river is never easy. If we were driving a car, we would simply put on the brakes. On a river, things are a little more difficult. We can put in stopping strokes, and slow to the speed of the current, but that means that can still be going more than 15 miles an hour. Even if we paddle backwards, we can seldom actually stop the boat. We need a toolkit of tactics to gain control. The first tactic is the most important – breaking out. Look for an eddy at the side of the river and PLF (Paddle Like F**K), remembering to lean hard into the turn. Once in the eddy, you can look over your shoulder and take time to plan your route down the river, and select the next eddy you want to enter (and a back-up one in case you miss it). Over the years we have paddled 100s of miles over the years eddy hopping from eddy to eddy. Each time we break out, inspecting the river from the boat and planning the next 20-50 yards downstream. Often however, we want to stay in the middle of the river for maximum flexibility – if for instance we don’t know which way to go next. Breaking out of the current and back I again is also excellent for practising your river skills and your fitness. Alas too many times I see even seasoned paddlers blunder down the middle of rivers too fast, with rather predictable consequences.
A few of the less well known tactics which have the advantage they can often be used mid-river are: broadsiding your kayak onto a small rock, which with the appropriately pronounced downstream lean onto the rock, can provide a very stable platform to view the river below (I frequently use this one above big drops provided the current is not too big), secondly, stoppers can provided a good place to park albeit they can be less stable and can if big obscure your view below. I typically choose a stopper if the group has become too close together and I want to space out a bit. Finally a surf wave can be used, which though usually the most dynamic and unstable place to stop, has the benefit that the wave can often be surfed along to take you from one side of the river to the other. The upper Dart is ideal for these tactics, with many many opportunities to stop mid-river.
Use a low-brace for stability
Like stabilisers on a bike, a proactive low brace
can steady a paddler in almost any conditions. This is the best stoke to
get down rapids – as well as providing stability, the low brace can be
used to turn the boat. In white water it is also my stroke of choice for
breaking in and breaking out. This is the one stroke you have to master
to proceed. If you are planning your first white-water trip make sure
you practise your low braces.
So here are a few tips for optimum low braces – the stroke is best placed so that the blade goes into the water in line with your hips or slightly behind, with the lower hand close to the water. The upper hand should be slightly forward of you hips but as low as possible, so the shaft is almost touching the cockpit. Now for the important bit – to get the best out of the stroke, you want the maximum leverage possible, so your lower arm should be almost straight out sideways, and your body should by leaning towards the blade. Your elbows should be pointing upwards so you can put your full weight on the blade.
If your elbows are below your wrists, then you are high bracing. Though a valid stroke in certain circumstances, the high brace should be avoided as it is easy to dislocate you’re your shoulder. My shoulder has dislocated twice using a high brace - in both cases I was bracing hard on a high brace mid river and a surge underneath the boat lifted the paddle and shoulder out of it’s joint – big ouch !
To use the low brace turn to break in, one should start someway down the eddy. Typically I like to be at least 2 boat lengths from the top. I like to enter the current at the absolute top of the eddy so I plan a route which takes me towards the top at an angle of about 20 to 30 degrees of the current. Bags of speed is required to cross the eddy line, with some downstream lean(20-40 degrees). As I begin to cross the current I turn my head in the direction I want to go. Because my head is connected to my shoulders, my shoulders also turn and the upstream knee lifts; this automatically raises the upstream edge and carves a turn. I place the low brace with my arm stretch slightly behind my body as described above. Do not lean forward as that will slow the turn, if anything lean back slightly, and the now unweighted bow will turn more quickly. A common mistake is to try to exit the eddy too low down. Here the boundary between the eddy and the current becomes more confused and it is harder to time the turn. When breaking in and breaking out, the harder you lean on the blade, the more support you will get, and the faster you can turn.
The key to breaking out is actually hitting the top of the breakout. Again I like to be right at the top of the breakout where the boundary between the eddy and the current is at its sharpest. To to hit the top of the eddy I usually begin crossing the current upto 10+ boat lengths away so that as the boat passes downstream of the eddy I am within ½ a boat length and moving towards the eddy at speed (usually at an angle of 30-45 degrees to the current. To initiate the turn lean forwards, and turn your head to look upstream (the boat will begin to spin around the front of the boat). As with the break-in, your shoulders will follow and the downstream leg will lift angling the boat. Don’t try to look at the break out – it will slow the turn, look upstream instead. Done right you will not need to brace at all but you might need to brace into the turn. If you find yourself having to brace on the outside of the turn then you are not turning your head enough (and shoulders, lifting leg,…)
One common question asked is when should I use a bow rudder on a river? My view is it this stroke is only used to pose and impress the opposite sex. It is bad for your shoulders, provides very weak support, and cannot be used on rocky rivers. If I use it at all it is normally to breakout behind rocks where I am confident that there is a static eddy with no rocks in. Slalom boaters will tell you that you can save a couple of nanoseconds going round the poles with a bow rudder, but whitewater paddlers work with the water and speed is not crucial.
On fast rivers wide rivers it can be necessary to
begin moving towards the breakout literally 50-100 yards before you get
there.
For stability in big wave trains, a low brace can help. Seek to place the brace on the top of each approaching wave and lean hard onto the wave. You should find it easy to go down wave trains forwards, sideways and backwards provided you have a low brace in place. In fact I frequently go down sideways because then I am certain on which side I need to lean. I can also shoot the boat towards either bank with a single paddle stroke forwards or backwards.
Finally, I also use a low brace as I go down the tongue of big drops to steady the boat once you have gone over the lip of the drop, before I reach the bottom.
When shooting vertical drops, where the chances of bottoming out is high (known as pitoning), a low brace can be used to help slow the boat as you fall into the pool. This works well on drops upto 5m. Above that height if there is a risk of pitoning you will need to rely a shallow angle of fall, using a boof move. Above 5m and any brace can be a recipe for shoulder damage.
Use pool sessions to get your low braces combat
ready – get someone to try to tip you in, and you ought to be able to
stop anyone your one weight turning you over. Practice the low braces
constantly and you will soon become a white water expert.
Tips of getting out of
stoppers
Whether beginner or expert, we all get a trashing in a stopper sooner or later. However there are a few tips on survivability and indeed enjoyment of stoppers:
- If it is a big or unknown stopper. Make sure
you inspect it. What you are looking for is:
- A clear route in and out of the stopper. The more water flowing out of the stopper the better. A safe stopper will have a clear outflow, which lies along the natural route in and out of the stopper.
- Look for the weak point. Few natural stoppers are uniform – they have a weak point on the surface where there is a natural release of water down stream. Even if they are man made weirs there has to be a release. Sometimes in the horrendous weirs and pour-overs this release tends to be deep under the foam pile. Understand where the release is before committing to the stopper.
- Look for the tow-back – more than 2 feet of towback and you are going to need a lot of speed. Consider going around.
- If the stopper has a vertical drop leading in to it, the stopper will have much more power. This can be very dangerous, and difficult to exit. Avoid when possible.
- A vertical stopper if it is formed over a rock mid-river, can be very difficult to exit. The stopper is U shaped with the arms of the U heading upstream. Paddling upstream in a pour-over is very difficult.
- Seek stoppers with a natural downstream U shape – they are the easiest to exit, the current will naturally flow you downstream.
- Look for the kick of grain of the stopper – natural stoppers are usually one sided with the current flowing to the left or to the right, plan to use this natural current to help you exit.
- Finally look carefully for obstructions, especially trees just under the surface.
- To get out of a stopper when inside consider
your options. Here are a few tips.
- Capsize – once your head and paddles are in the flow under the foam, most times you will come out naturally. The longer you wait before rolling the better your chances of success. To increase your chances further push your arms and paddles deeper, so they are further into the current.
- Surf to the ends – stabilise the boat with a low brace, then with a series of forward strokes angle the boat upstream, and pull your way to the end. You can use a combination of a sweep stoke and then a forward going low brace to stay stable. Often you will find that you need some momentum to get out, and you may need to surf the boat forwards and backwards along the stopper to until you get enough momentum to surf out.
- Keep you head and body up, with the least lean on the boat you can get away with . Ideally you want your boat to be as flat as possible since this allows your boat to skim or plane along the surface easily. Bracing deeply with your chest in the water makes the boat hard to manoeuvre – your fighting your weight and the boat has a big keel effect from the edge. With the boat skimming it is easier to surf along the stopper, and with your body upright you can use your powerful back muscles to drive your boat along the stopper.
- Work your way UP the stopper. Sitting at the bottom where the green water touches the foam pile is unstable. Seek to gain height (and potential energy). Once you have height, you will need less lean, the bouncing will be less severe and it is easier to turn the boat. You can then convert that height into forward speed and you should be able to surf along the stopper. A few tips to gain height: edge the boat hard for 20 seconds or so and the drag can bounce you upwards, or surf along to a natural weak point and use the flow to carry you upwards. Surfing towards the ends is a great way to gain height – the towback is usually less at the ends. It may not be enough to release you, but you have gained more control. Finally, you can wait for a natural bounce, to lift you. Once is a double decker sized hole in Ecuador, I was lucky enough to get 3 big natural bounces which lifted me 12 feet up the stopper and from there I was able to surf my way out. Rodeo paddlers use these techniques to get to the top of the foam pile so they can then initiate their cartwheels,…
- If you can’t surf out consider cartwheeling or looping out which is often my next choice. Basically you are trying to get a significant part of your boat into the greenwater under the foam so your boat gets dragged out by the current. The set-up requires you being at right-angles to the current so it requires a little height. You can’t turn the boat when you are at the bottom of the foam pile, so gain some height, turn the boat and then lean hard to depress the nose or stern. If is works you are usually taken deep, pushed hard downstream, and you can roll-up outside of the stopper.
- If you still can’t surf out or cartwheel out, and you can remain upright then go for stability. Find the easiest part of the wave and wait for assistance. A boat floated into stopper on a line is ideal, of a better paddler pushing you out with their boat.
- If you decide to swim, then you have a couple of choices – swim out, and underneath the foam pile or jump out and over the stopper (I know people who have done this, but never done it myself). Remember to take a massive breath of air before bailing out !
Inspect ! Inspect !
Inspect !
I find that the secret of paddling difficult rapids and pushing your personal boundaries is to mentally prepare for each obstacle you face, and inspect the route from the river bank before you paddle. This may sound too easy to be true, but through inspecting the river, from the bank we gain valuable information, which can be difficult to glean from the boat, and there are other benefits:
- We get to see the plan of the rapid and crucially it’s potential safe exits (usually eddies).
- We can estimate the speed of the rapid.This can be very hard to do from the boat. One tip to estimating the speed is to try selecting a square foot of river. Follow that section with your eyes or pointed figure as it heads down the river and count the number of seconds as it passes each obstacle. You will be often be surprised how little time there is between the obstacles and how little time your have therefore, to take avoiding action
- We can look for hazards. From the boat it is not possible to see the height of drops and stoppers, the strength of the towback of stoppers and to see things close to the surface such as almost submerged rocks and trees.
- You can take a mini-rest, and can clear the mind better than if you are still in your boat
- Finally you can focus on planning the route.
Naturally, if you are on the bank, don’t forget to take a rope, a sling and a knife. You will be ready to set-up a rescue for your mates if required.
One tactic that can often help inspect complex
drops is if some team members get out on either bank – it is often the
case that one side gets a better view of the river. This does need good
communication however!
Finally, if you get in the habit of inspecting rivers, you will be come more adept at judging when to shoot a section and when to walk around.
Plan your route
Planning your route usually means identifying the path where most of the water is following and simply planning a route which will take you that way (unless it is obstructed). Typically, most of the water flows round the outside of the bends, and most of the eddies are on the inside of bends. So a normal run would be to paddle into the current, following the outside of the bend where visibility is the best and where (usually) there are fewest rocks, trees etc, and then break-out at the end of the rapid in the inside of the bend. Typically I plan my routes from the exit/safe point I want to get reach and then working backwards, planning a route which will get me to my safe point. In a more complex rapid, you should be seeking to plan you path, stroke for stroke, working out what angle you need the bow to be heading, and anticipating which side you need to lean in the waves and current. Don’t forget to plan those back-up exit routes, because after a capsize, you can quickly be several 100m downstream. We once paddled one the hardest rivers in the USA the North Fork of the Payette, which falls quickly at 330 feet per mile, at times reaching 30 miles per hour. Despite it being 15 miles long, we broke it down into stretches of 100-200yards. We planned each section, and our exit routes, and then our crucial back-up exit routes. We then paddled the section and inspected and planned the next one. At one point I capsized three times in quick succession, and ended up 400 yards further downstream than expected. Fortunately, I had planned properly and knew where to go after I regained control. With a little practice you will find you can memorise complex routes stroke for stroke easily.
Time for a golden rule: - plan very simple routes with few changes in momentum.
When you run a section, plan your route and before you allow your momentum to build, consider how you are going to lose it again. Keep your speed down and your routes simple. Simple routes with fewer turns are easier to make and they conserve your energy..
One element of planning that is usually overlooked is that once you are back in your boat, the river can look very different from when you were inspecting the river. Imagine you inspected the river from a path on the bank (say) 20 foot above the river level and then you get into your boat barely 3-foot above the river, and there are 6-foot waves blocking your view. You may find your it impossible to make your planned route. There are a couple of handy tricks - I have a friend, Andy, who believes you should inspect every river, at river level and sitting down, so you remember the rapid if you are in your boat. My preferred approach however, is to select sighting lines which are visible at any level – usually distinctive trees and cliffs.
True story - on one occasion in New Zealand, when I
was soloing a river, I had inspected the river, got into my boat
realised I could not see enough from my boat and had to get out of my
boat again to reinspect and plan new sighting lines 3 times. Finally on
the fourth time I was convinced I could make the line and exit route I
wanted
One of the most common questions asked is which side of the rapid should I go ? My advice is go with what you know. A classic British paddler trained in Wales, Devon or the French Alps is better with rockier more complex routes which require you to dodge and defend rather than negotiating big holes and whirlpools which the USA or Zambesi paddlers are more familiar.
If in doubt find a willing person to run it first – Pete Thorn will usually volunteer. If still in doubt – walk. If you think your going to capsize – walk. If you capsize you will seldom make your lines !
Learn the danger signs
Before you even get on the water, check to see if the river is not dangerous than usual (e.g. due to usual water levels)
- Check the colour of the river – a brown or grey river full of sediment usual indicates higher than usual river levels
- Look at the base of the trees. If the roots and the trunk are in the water then the river is usually in flood.
- Look to see if there is debris floating down the river
- Check multiple points on the river. As a minimum inspect both the get in and the get out prior to getting on the river.
These simple checks may sound like common sense, but I once got it spectacularly wrong. We inspected the river from the top of a steep sided canyon, and watched a motor raft bob down the river. The river was very wide, one of the biggest we have ever seen, but looked flat from above. We got on the river, which started flat though moving quickly. As the wall of the gorge closed in and the river accelerated into the entrance rapid the waves quickly grew above out heads, and ominously there was a roaring near the only breakout we have spotted from the canyon walls. The Rock in the middle of the river which was to have been out first breakout had a massive cushion in front and seething boils behind. We stayed well away. On either side of the river whirlpools had formed with trees stuck in them. Approximately 30 foot wide with 3 foot cores, the whirlpools looked forbidding. We stayed in the middle of the current preferring the surging waves and suckies. Suckies are the air pockets which collapse underwater and suck you down often 6 foot or more underwater, before releasing you (usually upright). We did not make a single break out in 16 miles. After finishing the river, a local kayaker said the river was at its highest for years – over 40 feet above its usual flood level. He thought we were kayaking gods, as opposed to how we felt which was rather foolish.
So, here are 5 signs that the river is about to get much harder:
- Noise – you can usually hear a big rapid thundering before you can see it.
- The river banks go from wide and flat to narrow, tall and steep – a gorge awaits you. Before you commit to the gorge, make sure it is runnable, or you can hike out easily.
- A sharp turn usually indicates a rapid ahead. If is a fast flowing river then there is usually a large cushion of water, high on the wall of the outside of the bend as the rivers kinetic energy is transferred in to height (potential energy) before getting transferred back into speed (and kinetic energy. The inside of the bend is usually easier, but watch out for boils and whirlpools. You can often paddle on the cushion for a high energy bouncy ride, but take care not to hit the wall.
- A steep river coming joining from the side usual means there is a rapid. – a steep river will bring rocks and debris and deposit them at the junction as it hits the slower moving river, and a rapid id usually guaranteed J
- A horizon line (where the river appears to stop) indicates a fall. Take a look at the trees on the banks as you approach to estimate the height of the drop. If the trees are much lower – beware. Also look to see if you can see a strong outflow from the fall – if yes, then it is usually runnable, however if you can’t see the entire route inspect as there may be a hidden rock or tree in the drop.
Prepare and train for
accidents
Sod’s law says, even if you know the river and you think you are going to be safe:
· The river will be a different level to the last time you paddled
· There will be a tree in the main shoot of the rapid
·
Someone will capsize and get stuck on a rock out
of throwbag reach
·
Someone will break a paddle
·
Another paddler will crash into you
We all know accidents happen. We all like to think that we are ready for them when they happen. Rarely however, does an accident happen like the text book and when expeditioning the unexpected does happen. Here are a few real examples which have happened to me and my mates. Test your survival skills – what would you do ?
· A friend capsized and swam and was rescued, after some downtime. His boat however, got trapped under a rock, and was impossible to pull out – even with 6 big blokes. The gorge had steep sides and walking or climbing out was impossible.
· My friend split his spray deck in a remote and inpenetratable grade V canyon
· A poisonous snake climbed inside one of our boats
· I capsized, smacked my head on a rock and gave myself a whiplash injury up and down the spine. We were in the middle of the jungle and I could not paddle.
· The first 3 people in a group of 4 shot round a blind corner and got trapped under a tree across the river
· A kayaker shoots a waterfall and hits the bottom, and gets trapped vertically out of reach of the safety crew
· A glacial lake held back by an ice dam which is breeched and then the river thunders down the valley. The river rises 20 feet in 2 minutes, bringing trees and boulders down the river whilst we are paddling it.
· As we come round a bend in the river, there is a major landslide in front of us and the entire mountain moves. House size boulders start crashing into the river,..
· The minibus is stolen
· The campsite is covered in tarantula spiders
So when preparing for your trip, don’t just think about the simple things – throwbag rescues, harness rescues, z-drags,… which are important, but also think about the full range of things that can and do happen.
Choose your buddies wisely
It goes without saying that you should choose buddies that will risk their life to rescue you, and vice versa ! More subtly, group dynamics are a key part of successful river running. Many of the rivers I did in South America I did with just 1 or 2 other people. Not the safest number in many ways, but often the team dynamics seem to work better. Big groups sometimes have more incidents because of two big (and avoidable) causes of accidents: peer pressure and too large a difference in standard between the team members. Too many times I have seem groups set out to the Alps or elsewhere, and initially be really understanding of each other wants and needs, then when it gets towards the end of the trip, some people become selfish, want to push their personal envelope, and push others beyond their limits. I have seen too many accidents happen this way, and it was a contributing factor in the death of a friend – be warned ! It is important to be humble on the river and a good set of buddies will stop you doing something foolish, rather than egg you on. Keep inspecting the river even if you paddled it a few days before – think about your buddies. One of you will have forgotten the route – guaranteed !
Choosing which of your buddies to be the leader is an important decision and should not necessarily be the best paddler. All of us can remember getting out to inspect a rapid, only to have the group behind head down without inspecting and then get a trashing. Usually it is the weaker paddlers get royally stuffed – often because the leader has not taken the best line, but more normally because the paddlers have not mentally prepared. The secret of paddling difficult rapids and pushing your personal boundaries is to mentally prepare for each obstacle you face. Lack of preparation can be disastrous. The buddy leading ought to be ashamed if any of his team swims. Personally, I think that poor river trip leaders need to be fined pints of beer, for each of their group that swim, rather than the usual custom of the swimmers buying the rescuers the beer ! The leader should role model the safety skills of inspection and route planning. Unfortunately this is not always the case, and paddlers you not be afraid to stop and get inspect even if the leader piles down the river. Running each rapid and section should be a personal decision – do feel compelled to follow a poor lead. If the leader swims then the situation gets more tricky and a fine judgement is required on whether to follow by boat or whether to run down the bank with a throwline.
Be Prepared
As you will have observed already, I think mental rehearsal and preparation in important on-riiver and off-river is very important. For me, before I plan big trip I generally split my preparation into several stages:
- Restart training to build stamina and skills. For me the perfect mix is rodeo for skills and balance, with either surfing or flat water paddling for stamina. One controversial view is that surfing, though fun, makes for poor skills preparation for big rivers - the absence of river currents and simple shape of the waves on the sea can lead to bad habits. There is, I think, no substitute for genuine moving water practice. I always like to get my rolling practice in on moving water.
If this is your first white-water trip make sure you practise your low braces. These very simple strokes are the ones you will use 75% of your time on the water – to break in, for support and to breakout. If you are a surfer or a slalom paddler and you don’t use them already - learn them ! Use pool sessions to get your low braces combat ready. I actually had 2 swims in quick succession very early on in the season last year, because I had not trained enough over the summer. When accidents happened, the lack of practise and mental rehearsal was evident – I had lost the mind game and with it my confidence. I had to practice hard to get it back.
- Mend all of your gear and refit out the boat,
replacing any shrunken padding. Check you splits, buoyancy bags,
throw-ropes. Its easier to replace them in the UK !
- Selecting the right boat for the rivers is important. One boat good enough for all rivers alas does not exist. For big water, you need a medium to big volume boat with sleek lines, and edges to carve. A spinning disc hull is fun for those big waves, For the typical Devon rivers, you need short boats with high rocker, to enable the boat to turn quickly. For The upper Dart and the Lyn, you need a blunt nose and tail which won’t dive deep after drops and get stuck (aka pitoning), or backloop. For the loop, a nice slashy tail is great for eddies. Personally, I have more than one boat, so I can use the right tool for the job.
- Generally I buy the guide book to the region, obtain and videos I can and read-up on the internet, so I know what to expect.
- I recommend you plan the first 2-3 days of your trip as a warm-up, paddling well below your maximum. It is important to build up your reflexes and time to get to grips with the local geology. Why geology I hear you say ? Most mountain ranges, are built from one type of rock. In Devon, it is a hard rock, which tends to form ledges – e.g. the river Lyn or Dart. In contrast for instance in Ecuador, there are few drops, rivers were a constant gradient, but were filled with huge boulder gardens. Again by contrast rivers in Norway have few rapids and (too) many waterfalls. Each country and region is different, and it helps to get to know the feel of the place before planning your first Grade V epic. Different river types react differently to water levels. It is important to know what will happen if it rain hard the previous night, or it is raining when you get on the river.
Time for a golden rule: - plan easy trips for
your first few days so you can acclimatise.
Variety is
the key to learning quickly
Many of us paddle our local river more than any other. We get to know what to do round each bend, and in each stopper. We try new things initially, but eventually our skills level peaks and we cease to improve. Variety is the key to continuing to improve.
Quite a few years ago, I was in a university canoe club. We were in quite a structured environment – each term was 10 weeks, there were 3 terms and we stayed there only 3 years. We developed a plan for each year taking us to visit a new river every weekend in the winter, and planned a few surf trips and weir bashing trips for the spring. We all started as beginners, and to our surprise we became accomplished grade 4-5 paddlers after 3 years. Pretty soon, we realised that we could teach take people from beginner to grade V in a single year ! The key was our informal yet structured plan.
My advice is not to stick to one river, nor one
boat, nor one style of paddling. Each time you mix it up, you learn
something new. My whitewater paddling improved no end once I started
squirt boating, because the instability of the boat forced me to become
an expert at bracing strokes. Rodeo is ideal because it teaches dynamic
balance- a boat cartwheeling is actually quite stable once you
understand the importance of momentum – building it and using it.
Paddle defensively
Much of what I have said so far has been very safety conscious, but I would not want to underestimate the importance of pushing your limits and making mistakes as a way of learning. However there is a time and a place – don’t push your limits in an inpenetratable canyon, where there is no hope of rescue for instance. Make sure you chose carefully when and where to take risks. Personally, I think that if I have capsized in anger on a river trip that I have failed. However if I have not capsized while rodeoing then I think I have not been trying hard enough.
Also choose your boat wisely – you can have as much
fun and be as out of control in a squirt boat on grade 3 as a rodeo boat
of grade IV or a whitewater boat in grade V. But if you are travelling
somewhere new, choose a safer boat.
Much has been written on the psychology of
football. Much less has been written on the psychology of kayaking.
Personally I like a little danger and adrenaline but there are 2 tests
for the doability any rapid: if you spend more than 5 minutes inspecting
or if you can’t spit because you mouth is too dry, you should walk
around it. Talking your route through with your mates, is a great sanity
check. Often they have stopped me doing something I would regretted. .
Finally, Soloing rivers is probably best left to the experts and/or the very well insured. Although I do do it, the risk factors are incredibly high, and you need to select your river with a lot of care.
Take care out there
Hugh
Appendix - Top rivers
Here are some of my favourite rivers in the UK and overseas to hopefully inspire you to try some new rivers.
Favourite 10 places in the UK
- Fairy Glen, Conwy
- The Orchy, Scotland
- Aberglaslyn Gorge, Wales
- Findhorn, Scotland
- Hurley Weir, Thames (4 gates)
- Lyn, Devon
- Upper Dart, Devon
- Lynmouth surf (if over 6’+ at Croyde)
- The Bitches tidal race, Wales
- Shepperton Weir (10 gates)
Favourite 10 places in the world
- The Grand Eyvia, Italy
- Jondachi River, Ecuador
- North Fork Payette, Idaho, USA
- Pacuare, Costa Rica
- Sanna, Austria
- Grand Canyon, Arizona, USA
- The 100s of beaches on the north coats of Spain
- Zambesi, Zimbabwe
- Sun Kosi, Nepal
- The Bulkly Canyon, Lochsa River, British
Colombia, Canada